How to Send Photos From Iphone to Ipad
Being an iPhone user, I was struggling to transfer photos from iPhone to iPad. No, you are not alone because many people face this problem like me. Hence, we curated the content to help you grasp the idea behind how to transfer photos from iPhone to iPad. Even if you are thinking of using the iPad instead of the iPhone, then this content shall help you a lot in transferring photos. You will get the answer to your question how do I transfer photos from iPhone to iPad? The methods and steps given here are simple to execute and understand. This way, you will not lose your old iPhone pictures and have them safe on your iPad.
Part 1: How to transfer photos from iPhone to iPad via MobileTrans - Phone Transfer
MobileTrans is an intuitive and efficient data transfer application built for Windows and Mac users. iPhone users can use it to transfer photos from iPhone to iPad in an effortless way. It is a versatile file transfer tool for learning how do I transfer photos from iPhone to iPad. It enables users to transfer the data between mobile devices running on Android and iOS operating systems.
Along with the data transfer option, you can back up a phone's data, transfer WhatsApp media, and do much more without jailbreaking your phone. Millions of users located worldwide are using this application to meet their file transfer needs, and iPhone users can use it to sync photos from iPhone to iPad too.
Step 1: Install MobileTrans
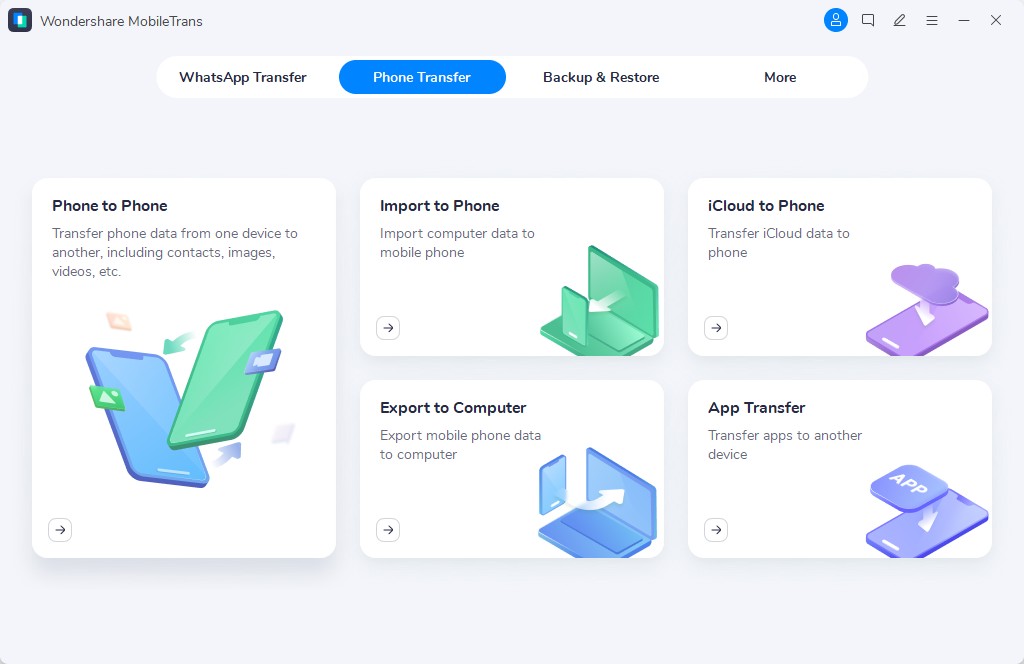
First of all, download MobileTrans and wait for a few minutes until your computer finishes the installation process. Launch the application and choose to be 'Phone Transfer.'
Step 2: Select the Source and Destination Device
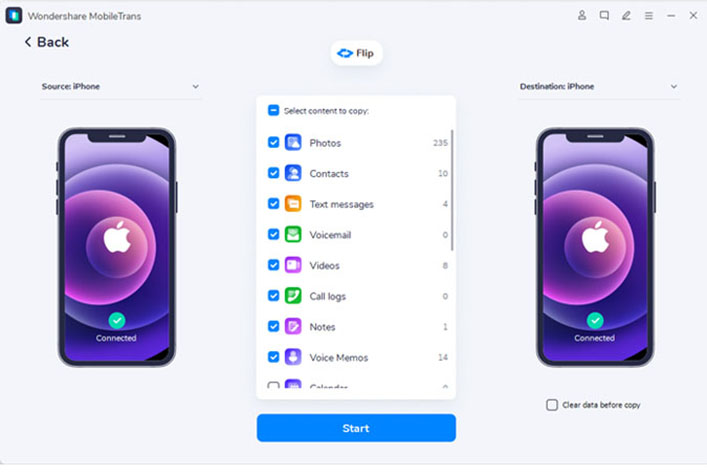
Now, you need to choose the destination and source device. Since you are sending data from iPhone to iPad, select iPhone as the source and iPad as the destination device. Select the Flip option to replace them.
Step 3: Select file type and Send
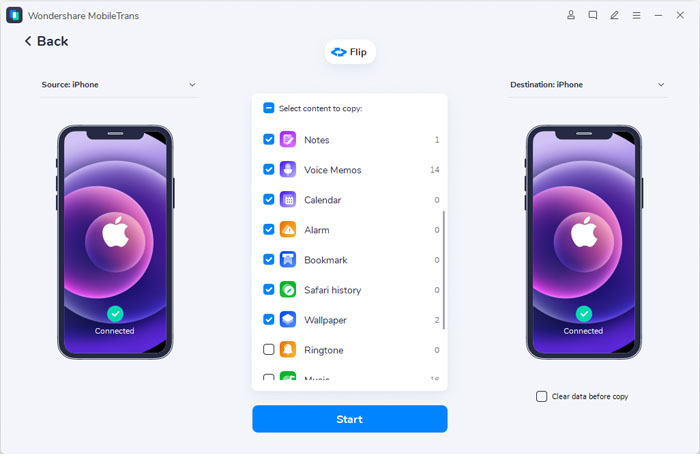
Select the data types you wish to transfer. To send images, click on Photos. After that, click on Start to initiate the transfer process. So, that is how to get photos from iPhone to iPad.
Part 2: How to sync photos from iPhone to iPad via iCloud
iCloud is the best cloud-based storage service offered by Apple for iOS device users. The service allows users to store stuff of their Apple device and sync photos, movies, documents, and much more securely. More than 900 million users are using it to access their iOS device content in another Apple device. You can use it to sync photos from iPhone to iPad, and it will do it effectively to multiple devices.
- Go to Settings > iCloud to launch it. When it open, type your Apple ID and password to log in to your account.
- Choose all the data you are interested in transferring. Right now, you want to move photos, so tap on it to switch it on. We already did it for you, as you can see in the picture above.

- Do the same on your iPad, and this is how to sync photos from iPhone to iPad. Do not forget to turn on the internet connection or Wi-Fi must be turned on.
Part 3: How to transfer photos from iPhone to iPad Using AirDrop
If you are pondering how to transfer photos from iPhone to iPad wirelessly, then we are going to tell you in detail. We do not want to disappoint readers who can't find iCloud or using software like MobileTrans useful. They can try AirDrop that could be a reliable option to transfer photos from iPhone to iPad. It provides a quick to work facility to transfer files among iPhone, iPad, and Mac users. Faster and highly secure, these are the two best properties of the Airdrop feature. The use of Airdrop is not limited to sending photos only. You can send other file types without using Wi-Fi, Mail, Bluetooth, or a mass storage device.
- Enable AirDrop on both device.
Turn on the AirDrop using the control center on both devices by swiping up from the bottom. Also, turn on Bluetooth and Wi-Fi when asked. If the person is in your contact, then choose Contacts Only and, if not, tap on Everyone.

- Open the Photos application on your iPhone. Tap on the Select button at the upper right corner to choose the images you want to transfer to your iPad.

- Now, you have to hit the Share option and choose AirDrop to transfer. Your iPhone will show the iPad as the option, so just tap on it. On your iPad, accept the picture sent to you.

Part 4: How to move photos from iPhone to iPad Using iTunes
iTunes is an official application of Apple that supports file transfer and backup features. It is a media management application developed for Mac and Windows users. You can download music, TV shows, podcasts, and so on. This software is suitable for learning how to get photos from iPhone to iPad. It's the perfect application to sync photos from iPhone to iPad.
- Open iTunes in your Windows PC or Macintosh Desktop. Connect the iPhone and iPad to the computer via USB. Ensure that you have installed the latest version of iTunes. To import photos to an Apple device, iTunes 12.5.1, or a version older than that is essential.
- When your iPhone gets connected to the PC, it will look like an icon in iTunes. Click on it and then on Summary.
- In the Setting menu, you can view all the contents type that you can transfer from iPhone to iPad. This way, you can transfer pictures to iTunes that you can transfer to your iPad now.

- As you can see above, we were syncing music, but you can choose the Photos option given on the menu. Sync your iPad with iTunes to end the process of file transfer by clicking on Sync Photos (as shown like Sync Music)and then click on Apply. Don't remove the device while doing all these things.

Part 5: Transfer pictures from iPhone to iPad using Photo Stream
When the Photo Stream feature is on in your Apple device, it helps upload the most recent files from iPhone, iPad, or iPod touch to iCloud. You can access the photos from any of your Apple tab or smartphone. Except for live images, it uploads the most recent 30 days photos to iCloud. The maximum number of photos that you can sync with this method is equal to 1000. This feature only works when the Photo Stream feature is active on both devices. Besides, you must be logged into your iPad with the same Apple ID as on your iPhone.
Step 1: Open Settings and Log in
Go to Settings on your iPhone and log in to your account with the help of Apple ID and password.
Step 2: Open Photo Stream

After logging in to your account, tap on iCloud and then on Photos. Go to the Photo Stream and slide to the right to turn it on. Repeat the steps on your iPad.
You successfully synced photos from iPhone to iPad.
Step 3: View Photos
Lastly, to open Photos on your iPad, go to Albums>Photo Stream and view the imported photos from iPhone.
Conclusion
Now, we hope you are confident in the methods of how to transfer pictures from iPhone to iPad. We provided you the options of Photo Stream, AirDrop, iTunes, and MobileTrans. All these tools are extremely good at doing their jobs. However, try a different method if one fails, and we assure you that you will discover that the best way to transfer photos from iPhone to iPad is MobileTrans. So what you think now after reading this article? Can you do it on your own? If your answer is yes, just go for it.
How to Send Photos From Iphone to Ipad
Source: https://mobiletrans.wondershare.com/ipad-transfer/transfer-photos-from-iphone-to-ipad.html
0 Response to "How to Send Photos From Iphone to Ipad"
Post a Comment